![[return to the blue blog]](images/blueroom/blue_sheep_box.jpg)

softies
the knitsmithy the blue blog - archives works in progress finished projects free patterns contact: alison [at] knitsmiths [dot] us |
  turtle buddy from Bend-the-Rules Sewing pointy kitty from wee wonderfuls
november 19, 2008
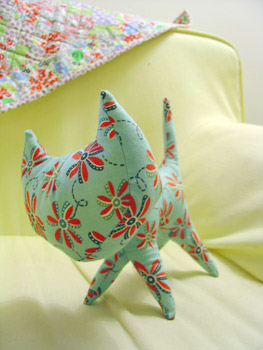
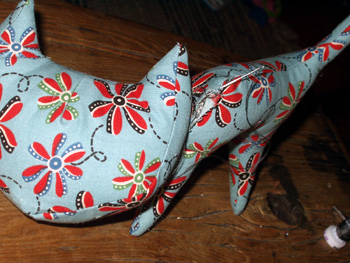
meeeeeooooow That's the sound my daughter makes every time she sees blue kitty (sewn from this pattern) on my dresser. Poor blue kitty has been sitting on our dresser with pins holding its head closed and attached to its body for a year. In fact, I posted the picture of blue kitty in that state exactly a year ago today! "Meeeeeoooooow," says wee one. I'd say, "Sorry, sweetie, you can't have blue kitty. She's has pins in her. Ouchies. Mommy has to finish making her." And then I'd forget. Bad mommy! Until Monday....
I had the blue thread out to work on a little dress I'm making for wee one right now and thought, now's the time to sew up blue kitty and give her to wee one. She has been meeoow-ing around the house ever since! posted by alison at 9:31 am
| comments (9)
december 18, 2007
now even pointier
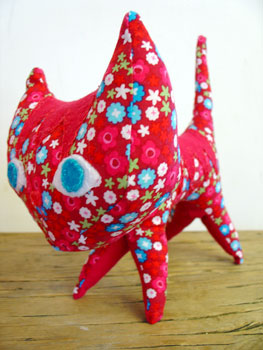
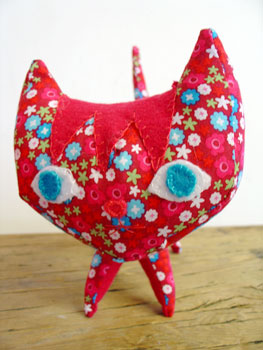
It's pointy kitty! My second pointy kitty, to be perfectly precise. The first is still nearly headless and completely faceless, as I haven't yet had time to get back to it to do the final sewing and embroidery. Christmas presents come first, so this red pointy kitty for the boys' two year-old cousin C has pushed to the front of the line. And it's a good thing I didn't waste any time doing the features on the other pointy kitty, because they took forever!
My buttonhole stitch skills are right up there with your basic 7 year-old, which means that it was slow going and all a little sloppy. Perhaps that's too harsh as far as the 7 year-olds go, but it sure does describe my talents. Still, she came out pretty cute. You can barely find the nose and the tiny whiskers in that red flower print, but the eyes stand out very well and really make the face, I think. And now if she'll just turn around...
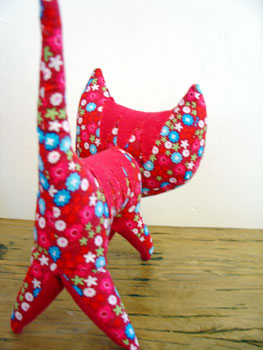
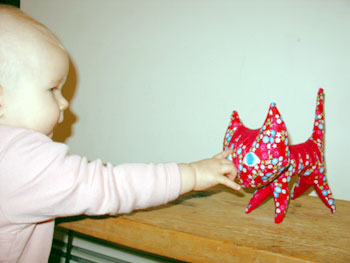
...you can see that the machine sewing is my real success story here. This pointy kitty is way pointier than the first one I sewed together because my stitching was so much better at the points and I did a better job of clipping and turning. Practice and all that, you know. As an added surprise, her little flannel stripes are super soft! I picked the flannel because it coordinated well with the flower print - the belly and inside of the legs are also done in the flannel - but never imagined that it would add so much texturally to the kitty. It really is a joy to pet this little critter. And the proof...
posted by alison at 9:14 am
| comments (15)
november 19, 2007
a head
Are you ahead or are you behind? It's that time of year again - time to start freaking out about all the holiday gifts I haven't started making yet! My list this year includes one lap quilt, one minkee baby blanket (both from Bend-the-Rules Sewing First up is the softie toy for 2 yr-old cousin. I searched around for an easy-ish pattern and found pointy kitty, a free pattern from the amazing Hillary Lang of wee wonderfuls (she also did the wee elephant softie in Last-Minute Patchwork + Quilted Gifts
I decided to start by making a practice pointy kitty for wee one with the blue fabric. Hillary's pattern really is wonderful. There's a good deal of easing and pinning that you have to do, but it was okay once I took the time to do it right. She warns you that pointy kitty is tricky to turn right side out and to get all pointy again after sewing, but after dealing with some of those teeny limbs on the sock creatures, I wasn't too worried. And actually, it was only that tail that gave me any real problems. By the end of the night, I had practice pointy kitty parts ready for attaching and final touches.
Cute, cute, cute. And I love that it stands up on it's own. The boys immediately recognized that it was supposed to be a kitty. I always find that reassuring when they have a positive reaction to my stuffed toys and can identify what they were supposed to be. But this is more than a kitty. It's a head-start on my holiday projects! posted by alison at 9:06 am
| comments (12)
october 2, 2007
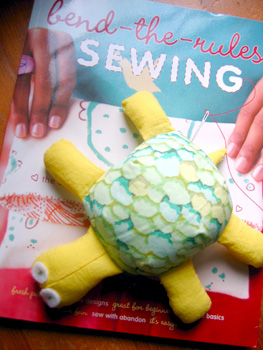
turtle buddy!
Wee one has a new stuffed friend - it's turtle buddy from Amy Karol's Bend-the-Rules Sewing
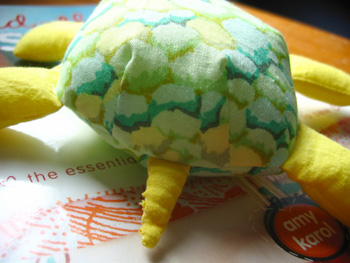
I love his funny little turtle butt. But man oh man, was it hard to turn that tiny tail piece right side out! Oddly enough, the entire pattern was both more and less difficult than I was expecting. Amy has bent the rules alright, so anyone with sewing experience, be sure to follow her rules. Don't go tracing your pattern pieces and then cutting them all out before reading the pattern like I almost did! Karol uses this clever technique of sewing two layers together along the pattern outline, which goes faster and makes things much less fiddly but it means that the pattern pieces don't actually contain any seam allowances. But not all the pieces are done like this: the body pieces are cut out and sewn together normally with a 1/4" seam allowance. So naturally I got all confused and was never quite sure I was doing things correctly. And then I had all these questions, like how much should I stuff the pieces, and how far in should I sew the basting line, and where exactly should I position the legs and tail and head, and how big of a stuff/turning hole should I leave open in the bottom? There are are lots of helpful drawings in the pattern, but not a lot of specific details. Again this may only be a problem for folks like me with enough sewing experience to expect these sorts of instructions, but not enough experience to know that you don't really need them. After making the thing, I can see that if you just use your best judgment on all those things, it's gonna look adorable!
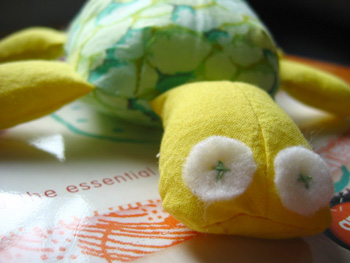
Isn't it cute how the wonky seam line gives him a funny little frown?! It's so cool making things from this book and seeing how they come together. My favorite part was after the top and bottom were stitched together (right sides together, of course) with the head and all the legs all tucked inside, you turn the whole thing right-side out by pulling all the limbs through the turning hole - it was just so turtley! posted by alison at 9:52 am
| comments (24)
|